 Detail view
 The default view - Detail - is similar to the Mail section, with folders on the very left, item list in the middle and preview of the tasks details to the right.
Detail view
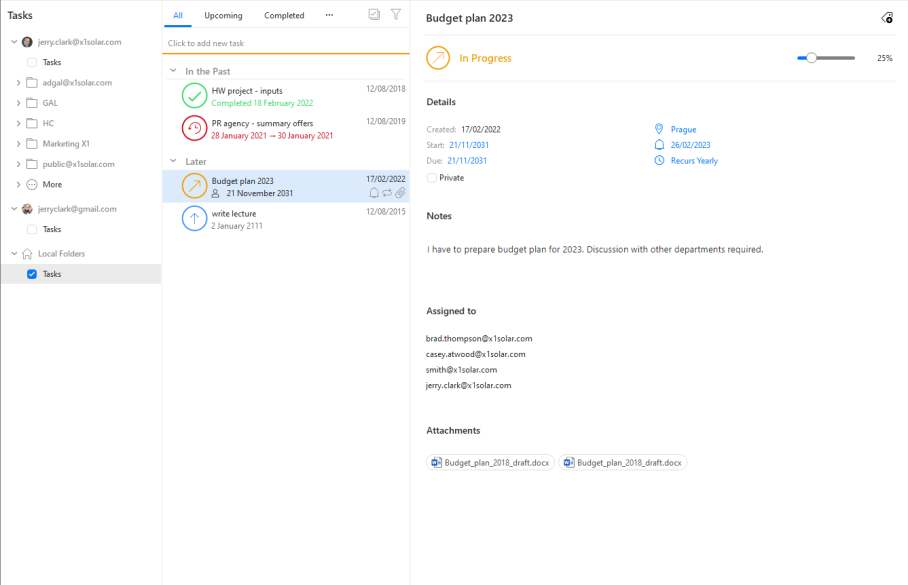
In the middle panel you can easily sort your tasks using the top bar:

All - this sort will show all your tasks no matter their status
Upcoming - only tasks that are yet to be finished will be shown
Completed - this option will only show tasks that are Completed
On hold - tasks that are set to be on hold or waiting on someone else
The tasks themselves will be color coded and have a corresponding icon depending on their Status.
![]()
Along with the graphical change comes the power to use an advanced filter to display your tasks. You are now allowed to sort and filter all your tasks the similar way you are used to from your mailbox. As you can see from picture below, the view can differ quite a bit.
This sorting will determine in what order your tasks will be shown in the list.
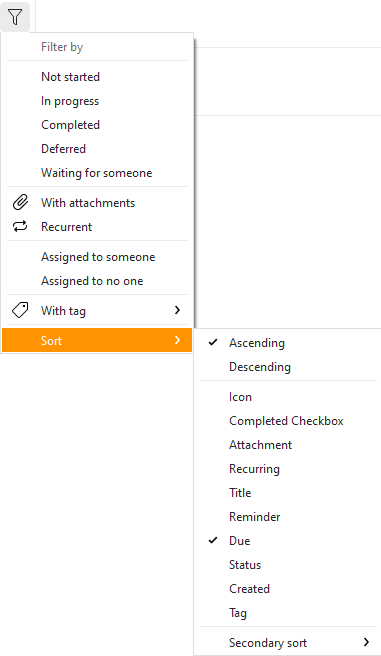
This filter will filter out items from your current list that match your given criteria.

On the right side you can see all the details your task includes, including all the start/due dates, location, assignees, etc.
 List view
If you want a simpler view, there is also the List option. The tasks are then shown in a simple list that contains data such as the subject of the task, scheduled deadline and the status of the task.

The detailed information on individual tasks is displayed in the columns. The tasks can be sorted by the details listed in individual columns. Click the column heading to sort tasks in the ascending or descending order (see the arrow next to the column's name) by alphabet, date or other criterion, depending on the column contents.
Users can customize the appearance of the table and the information shown. The columns can be added or deleted and their order can be changed. Right-click the table header, select Columns configuration... and specify the column settings in the Columns window.
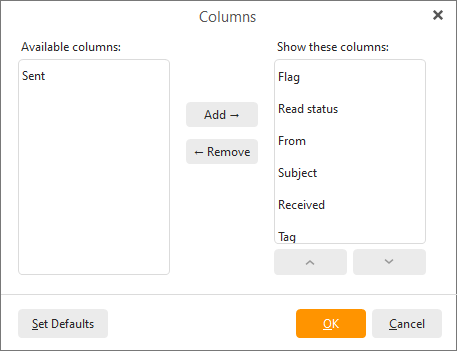
Checked columns will be shown in the dialog box, unchecked columns will be hidden. You can also change the order of columns. Just use the Move Up and Move Down buttons in the Columns window or simply use the Drag&Drop technique directly in the table header (left-click on one of the column headings and drag it onto the heading of the column you want to switch with).
The width of the task list's columns can be adjusted. To change the column width, click between two columns in the table header and drag the cursor right or left as needed. Another option is to use the Columns window (right-click the table header and select Columns configuration...). In there select the desired column and specify the requested number of pixels.
After a specific task is solved, it can be marked as solved in the task list using the checkboxes in front of every task. When the task is checked, its status is set to completed.